Showing posts with label craft. Show all posts

Tuesday, September 6, 2011

Spring is here!

Spring is here! Spring is here!

As the warmth and joy of spring emerges around us, we are having a most wonderful time at playgroup. The jasmine and freesias and wisteria are blooming, and during circle time outside we stop and breathe in deeply, as their scents gently drift past.

Our song time too is full of joyful verses and new energy that draw us out of that wintery place within.

We have been busy playing with magical bubbles, such enchanting things with their 'rainbow dreams' swirling within. We have also been telling Susan Perrows magical story "The littlest bubble".


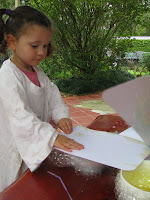
Spring Bubble Painting

The children absolutely loved this painting, it is so much fun, so easy and gives such beautiful results.

In a bowl squirt a little bit of dishwashing detergent, a little bit of liquid watercolour and a little bit of water. Add a straw and BLOW until the bubbles overflow. And yes - we did have a couple of children who sucked - ewwh (but one did go back for more!)


Gently put your piece of paper over the bubbles (we used watercolour paper but any heavy paper or cardboard will do).


Do this a few times until your paper is covered in the most beautiful rainbow bubble pattern.


The photos don't do this any justice, but they looked so lovely that I made extra for our 'Welcome Spring' Celebration invitations.


Wire and Bead Bubble Wands

What is a spring celebration without bubbles?
So we set to work making beautiful bubble wands in preparation for our spring celebration.


The children chose their beads, the mamas set to work twisting and curling gold, silver and copper wire to create these most spectacular pieces of art.


Each wand is so unique and they all look so beautiful sitting in a vase on my bench awaiting next week - they remind me of dream catchers. Make sure you have a look in later to see how we made them.

Our wands were inspired by the wands of Erica and James of Wizard Bubblewands. If you are looking for a unique birthday or Christmas gift their work is beautiful.
wizardwand2@gmail.com

Monday, November 8, 2010

Spring Ponies

For the past few weeks we have been busy making spring ponies.
The children have been waiting with much anticipation for their ponies to be finished. The time and energy that we put into these for our children is truly an expression of love, and each of these is unique and beautiful because of that.


Week 1 - Making the head
You will need
  • a mens sock in 'pony' colours, or other for something a little magical
  • felt for ears and eyes, and maybe a pair of buttons
  • wool for the mane
  • around 200g stuffing


Stuff the wool quite firmly into the sock for a nice thick head.


Sew on the ears and eyes. Then sew the mane by looping a long length of wool over and over, catching it at the neckline. Cut the loops at the bottom, and tie the strands together at the neckline to hold. (I hope that makes sense - hopefully the picture helps)


For more definition you can also give nostril indentations by knotting a thread and sewing it from side to side in the nose area, pulling tight.


Week 2 - Making the bridle
Rope Twisties!

You will need 2 long lengths of wool, approx 3 1/2 m each. Tie the wool together at one end, and have someone hold it. Then start twisting. Make sure you don't let go!
This was lots of fun.


When you've twisted all the way to the other end, bring the ends together to fold the length of wool in half (this can be a bit tricky without it twisting up on you). Hold on to the loose ends, then 1..2..3.. let go of the folded end.
Smooth out any knots.


To make the bridle
Tie twistie rope (at the folded end) around the horses nose


Bring the rope up over the head, then tie off on the other side of the nose piece.


Bring the rope back around to the other side (this creates the reins) and tie on to the starting point. Add some bells and any other decorative pieces.


Week 3 - Attaching the stick

Cut a length of reasonably straight, smooth stick around 80cm long and 2-3cm thick
I just collected fallen ones from our surrounding gums and native trees.


Drill a hole around 15cm down the length of stick.
Give the stick a light sand and polish with beeswax, it smells beautiful and brings out the rich natural colour of the wood


Attatch the head, pushing the stick up through the stuffing almost to the top.
Sew the sock (head) to the stick through the drilled hole, round and through a number of times for strength, then tie off.


Finally, let the fun begin!
Galloping galloping ho, galloping galloping hey
Running in the fields all day...
(from Restless Red Pony by Susan Perrow)


Hmmm, I wonder who is having more fun...


A butterfly came to add some magic fairy dust to this beautiful unicorn...

What a beautiful project this has been!
............
And a little peek at our nature table...


...simple and beautiful.


Friday, August 20, 2010

Craft Night Gnomes

On our final craft night for the winter season we made these sweet little gnomes

As per usual a hot cuppa and lots of gossip accompanied our crafty endeavours, to make for a late but lovely evening.

Now these handsome little gnomes are off to their new homes.

What a lovely surprise for the children to wake up to in the morning!

Acknowledgement and thanks to Nikki and Mia from the Silkwood craft group for the clothing pattern we used.


Monday, July 26, 2010

Winter Weaving Dream Catchers


Knitting, weaving, working with wood - they all seem to go hand in hand with winter, beautiful warming activities. Their repetitive action lets us move inwards with our thoughts too.

This week we made woven dream catchers, "for the faires to put their sweet dreams into" as my 12 year old told my 2 year old.

You will need some sticks (around 17-20cm long), sanded and beeswaxed if you wish. String (for tying and hanging), coloured wool, beads, charms and feathers

Make a frame, tying firm knots with the string to hold the sticks together. The frame still tends to be a bit wobbly.
Tie on the wool to one corner and form the warp, tie off at the other corner ...
then begin weaving your coloured wool through, adding beads and charms (you can add the spoken kind too) as you go.

When you are happy with your weaving, tie off. Add some feathers, and a hanging string...

and there you have it.

Sweet Dreams!